


OpenGL & Go Tutorial Part 1: Hello, OpenGL
Part 1: Hello, OpenGL | Part 2: Drawing the Game Board | Part 3: Implementing the Game
The full source code of the tutorial is available on GitHub.
Introduction
OpenGL is pretty much the gold standard for any kind of graphics work, from desktop GUIs to games to mobile applications and even the web, I can almost guarantee you’ve viewed something rendered by OpenGL today. However, regardless of how popular and useful OpenGL is, it can be quite intimidating to get started compared to more high-level graphics libraries.
The purpose of this tutorial is to give you a starting point and basic understanding of OpenGL, and how to utilize it with Go. There are bindings for OpenGL in just about every language and Go is no exception with the go-gl packages, a full suite of generated OpenGL bindings for various OpenGL versions.
The tutorial will walk through a few phases outlined below, with our end goal being to implement Conway’s Game of Life using OpenGL to draw the game board in a desktop window. The full source code is available on GitHub at github.com/KyleBanks/conways-gol so feel free to check it out if you get stuck or use it as a reference if you decide to go your own way.
Before we get started, we need to get an understanding of what Conway’s Game of Life actually is. Here’s the summary from Wikipedia:
The Game of Life, also known simply as Life, is a cellular automaton devised by the British mathematician John Horton Conway in 1970.
The “game” is a zero-player game, meaning that its evolution is determined by its initial state, requiring no further input. One interacts with the Game of Life by creating an initial configuration and observing how it evolves, or, for advanced “players”, by creating patterns with particular properties.
Rules
The universe of the Game of Life is an infinite two-dimensional orthogonal grid of square cells, each of which is in one of two possible states, alive or dead, or “populated” or “unpopulated” (the difference may seem minor, except when viewing it as an early model of human/urban behaviour simulation or how one views a blank space on a grid). Every cell interacts with its eight neighbours, which are the cells that are horizontally, vertically, or diagonally adjacent. At each step in time, the following transitions occur:
- Any live cell with fewer than two live neighbours dies, as if caused by underpopulation.
- Any live cell with two or three live neighbours lives on to the next generation.
- Any live cell with more than three live neighbours dies, as if by overpopulation.
- Any dead cell with exactly three live neighbours becomes a live cell, as if by reproduction.
And without further ado, here’s a demo of what we’ll be building:
In our simulation, a white cell indicates that it is alive, and black cell indicates that it is not.
Outline
The tutorial is going to cover a lot of ground starting with the basics, however it will assume you have a minimal working knowledge of Go - at the very least you should know the basics of variables, slices, functions and structs, and have a working Go environment setup. I’ve developed the tutorial using Go version 1.8, but it should be compatible with previous versions as well. There is nothing particularly novel here in the Go implementation, so if you have experience in any similar programming language you should be just fine.
As for the tutorial, here’s what we’ll be covering:
- Part 1: Hello, OpenGL: Install and Setup OpenGL and GLFW, Draw a Triangle to the Window
- Part 2: Drawing the Game Board: Make a Square out of Triangles, Draw a Grid of Squares covering the Window
- Part 3: Implementing the Game: Implement Conway’s Game
The final source code is available on GitHub but each Part includes a Checkpoint at the bottom containing the code up until that point. If anything is ever unclear or if you feel lost, check the bottom of the post for the full source!
Let’s get started!
Install and Setup OpenGL and GLFW
We’ve introduced OpenGL but in order to use it we’re going to need a window to draw on to. GLFW is a cross-platform API for OpenGL that allows us to create and reference a window, and is also provided by the go-gl suite.
The first thing we need to do is decide on an OpenGL version. For the purposes of this tutorial we’ll use OpenGL v4.1 but you can use v2.1 just fine if your system doesn’t have the latest OpenGL versions. In order to install OpenGL we’ll do the following:
# For OpenGL 4.1
$ go get github.com/go-gl/gl/v4.1-core/gl

# Or 2.1
$ go get github.com/go-gl/gl/v2.1/gl
Next up, let’s install GLFW:
$ go get github.com/go-gl/glfw/v3.2/glfw
With these two packages installed, we’re ready to get started! We’re going to start by creating main.go and importing the packages (and a couple others we’ll need in a moment).
package main

import (
    "log"
    "runtime"

    "github.com/go-gl/gl/v4.1-core/gl" // OR: github.com/go-gl/gl/v2.1/gl
    "github.com/go-gl/glfw/v3.2/glfw"
)
Next lets define the main function, the purpose of which is to initialize OpenGL and GLFW and display the window:
const (
    width  = 500
    height = 500
)

func main() {
    runtime.LockOSThread()

    window := initGlfw()
    defer glfw.Terminate()

    for !window.ShouldClose() {
        // TODO
    }
}

// initGlfw initializes glfw and returns a Window to use.
func initGlfw() *glfw.Window {
    if err := glfw.Init(); err != nil {
            panic(err)
    }

    glfw.WindowHint(glfw.Resizable, glfw.False)
    glfw.WindowHint(glfw.ContextVersionMajor, 4) // OR 2
    glfw.WindowHint(glfw.ContextVersionMinor, 1)
    glfw.WindowHint(glfw.OpenGLProfile, glfw.OpenGLCoreProfile)
    glfw.WindowHint(glfw.OpenGLForwardCompatible, glfw.True)

    window, err := glfw.CreateWindow(width, height, "Conway's Game of Life", nil, nil)
    if err != nil {
            panic(err)
    }
    window.MakeContextCurrent()

    return window
}
Alright let’s take a minute to walk through this and see what’s going on. First we define a couple constants, width and height - these will determine the size of the window, in pixels.
Next we have the main function. Here we instruct the runtime package to LockOSThread(), which ensures we will always execute in the same operating system thread, which is important for GLFW which must always be called from the same thread it was initialized on. Speaking of which, next we call initGlfw to get a window reference, and defer terminating. The window reference is then used in a for-loop where we say as long as the window should remain open, do something. We’ll come back to this in a bit.
initGlfw is our next function, wherein we call glfw.Init() to initialize the GLFW package. After that, we define some global GLFW properties, including disabling window resizing and the properties of our OpenGL version. Next it’s time to create a glfw.Window which is where we’re going to do our future drawing. We simply tell it the width and height we want, as well as a title, and then call window.MakeContextCurrent, binding the window to our current thread. Finally, we return the window.
If you build and run the program now, you should see… nothing. This makes sense, because we’re not actually doing anything with the window yet.
Let’s fix that by defining a new function that initializes OpenGL:
// initOpenGL initializes OpenGL and returns an intiialized program.
func initOpenGL() uint32 {
    if err := gl.Init(); err != nil {
            panic(err)
    }
    version := gl.GoStr(gl.GetString(gl.VERSION))
    log.Println("OpenGL version", version)

    prog := gl.CreateProgram()
    gl.LinkProgram(prog)
    return prog
}
initOpenGL, like our initGlfw function above, initializes the OpenGL library and creates a program. A program gives us a reference to store shaders, which can then be used for drawing. We’ll come back to this in a bit, but for now just know that OpenGL is initialized and we have a program reference. We also print out the OpenGL version which can be helpful for debugging.
Back in main, let’s call this new function:
func main() {
    runtime.LockOSThread()

    window := initGlfw()
    defer glfw.Terminate()

    program := initOpenGL()

    for !window.ShouldClose() {
        draw(window, program)
    }
}
You’ll notice now that we have our program reference, we’re calling a new draw function within our core window loop. Eventually this function will draw all of our cells to visualize the game state, but for now its just going to clear the window so we get a black screen:
func draw(window *glfw.Window, program uint32) {
    gl.Clear(gl.COLOR_BUFFER_BIT | gl.DEPTH_BUFFER_BIT)
    gl.UseProgram(prog)

    glfw.PollEvents()
    window.SwapBuffers()
}
The first thing we do is call gl.Clear to remove anything from the window that was drawn last frame, giving us a clean slate. Next we tell OpenGL to use our program reference, which currently does nothing. Finally, we tell GLFW to check if there were any mouse or keyboard events (which we won’t be handling in this tutorial) with the PollEvents function, and tell the window to SwapBuffers. Buffer swapping is important because GLFW (like many graphics libraries) uses double buffering, meaning everything you draw is actually drawn to an invisible canvas, and only put onto the visible canvas when you’re ready - which in this case, is indicated by calling SwapBuffers.
Alright, we’ve covered a lot here, so let’s take a moment to see the fruits of our labors. Go ahead and run the program now, and you should get to see your first visual:
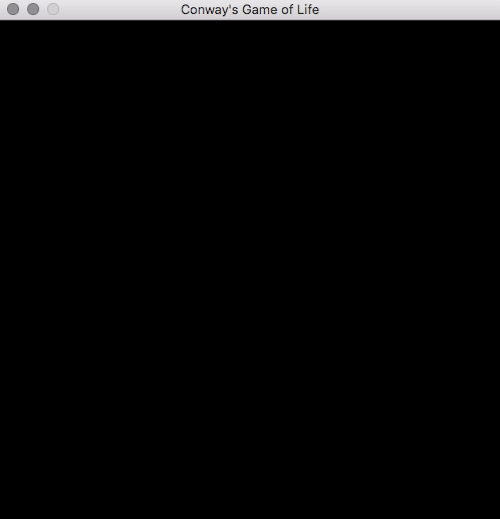
Beautiful.
Draw a Triangle to the Window
We’ve made some serious progress, even if it doesn’t look like much, but we still need to actually draw something. We’ll start by drawing a triangle, which may at first seem like it would be more difficult to draw than the squares we’re eventually going to, but you’d be mistaken for thinking so. What you may not know is that triangles are probably the easiest shapes to draw, and in fact we’ll eventually be making our squares out of triangles anyways.
Alright so we want to draw a triangle, but how? Well, we draw shapes by defining the vertices of the shapes and providing them to OpenGL to be drawn. Let’s first define our triangle at the top of main.go:
var (
    triangle = []float32{
        0, 0.5, 0, // top
        -0.5, -0.5, 0, // left
        0.5, -0.5, 0, // right
    }
)
This looks weird, but let’s break it down. First we have a slice of float32, which is the datatype we always use when providing vertices to OpenGL. The slice contains 9 values, three for each vertex of a triangle. The top line, 0, 0.5, 0, is the top vertex represented as X, Y, and Z coordinates, the second line is the left vertex, and the third line is the right vertex. Each of these pairs of three represents the X, Y, and Z coordinates of the vertex relative to the center of the window, between -1 and 1. So the top point has an X of zero because its X is in the center of the window, a Y of 0.5 meaning it will be up one quarter (because the range is -1 to 1) of the window relative to the center of the window, and a Z of zero. For our purposes because we are drawing only in two dimensions, our Z values will always be zero. Now have a look at the left and right vertices and see if you can understand why they are defined as they are - it’s okay if it isn’t immediately clear, we’re going to see it on the screen soon enough so we’ll have a perfect visualization to play with.
Okay, we have a triangle defined, but now we need to draw it. In order to draw it, we need what’s called a Vertex Array Object or vao which is created from a set of points (what we defined as our triangle), and can be provided to OpenGL to draw. Let’s create a function called makeVao that we can provide with a slice of points and have it return a pointer to an OpenGL vertex array object:
// makeVao initializes and returns a vertex array from the points provided.
func makeVao(points []float32) uint32 {
    var vbo uint32
    gl.GenBuffers(1, &vbo)
    gl.BindBuffer(gl.ARRAY_BUFFER, vbo)
    gl.BufferData(gl.ARRAY_BUFFER, 4*len(points), gl.Ptr(points), gl.STATIC_DRAW)

    var vao uint32
    gl.GenVertexArrays(1, &vao)
    gl.BindVertexArray(vao)
    gl.EnableVertexAttribArray(0)
    gl.BindBuffer(gl.ARRAY_BUFFER, vbo)
    gl.VertexAttribPointer(0, 3, gl.FLOAT, false, 0, nil)

    return vao
}
First we create a Vertex Buffer Object or vbo to bind our vao to, which is created by providing the size (4 x len(points)) and a pointer to the points (gl.Ptr(points)). You may be wondering why it’s 4 x len(points) - why not 6 or 3 or 1078? The reason is we are using float32 slices, and a 32-bit float has 4 bytes, so we are saying the size of the buffer, in bytes, is 4 times the number of points.
Now that we have a buffer, we can create the vao and bind it to the buffer with gl.BindBuffer, and finally return the vao. This vao will then be used to draw the triangle!
Back in main:
func main() {
    ...

    vao := makeVao(triangle)
    for !window.ShouldClose() {
        draw(vao, window, program)
    }
}

Here we call **makeVao** to get our **vao** reference from the **triangle** points we defined before, and pass it as a new argument to the **draw** function:

func draw(vao uint32, window *glfw.Window, program uint32) {
    gl.Clear(gl.COLOR_BUFFER_BIT | gl.DEPTH_BUFFER_BIT)
    gl.UseProgram(program)

    gl.BindVertexArray(vao)
    gl.DrawArrays(gl.TRIANGLES, 0, int32(len(triangle) / 3))

    glfw.PollEvents()
    window.SwapBuffers()
}
Then we bind OpenGL to our vao so it knows what we’re talking above when we tell it to DrawArrays, and tell it the length of the triangle (divided by three, one for each X, Y, Z coordinate) slice so it knows how many vertices to draw.
If you run the application at this point you might be expecting to see a beautiful triangle in the center of the window, but unfortunately you would be mistaken. There’s still one thing left to do, you see we’ve told OpenGL that we want to draw a triangle, but we need to tell it how to draw the triangle.
In order to do that, we need what are called fragment and vertex shaders, which are beyond the scope of this tutorial. All you really need to understand for this application is that shaders are their own mini-programs (written in OpenGL Shader Language or GLSL) that typically run on the GPU. They’re really interesting and force you to think in a different way to typically programming tasks, but again they’re out of scope for this tutorial. For our purposes, just understand that a vertex shader manipulates the vertices to be drawn by OpenGL and generates the data passed to the fragment shader, which then determines the color of each fragment (you can just consider a fragment to be a pixel) to be drawn to the screen.
We start by adding two more imports and a function called compileShader:
import (
    "strings"
    "fmt"
)

func compileShader(source string, shaderType uint32) (uint32, error) {
    shader := gl.CreateShader(shaderType)

    csources, free := gl.Strs(source)
    gl.ShaderSource(shader, 1, csources, nil)
    free()
    gl.CompileShader(shader)

    var status int32
    gl.GetShaderiv(shader, gl.COMPILE_STATUS, &status)
    if status == gl.FALSE {
        var logLength int32
        gl.GetShaderiv(shader, gl.INFO_LOG_LENGTH, &logLength)

        log := strings.Repeat("\x00", int(logLength+1))
        gl.GetShaderInfoLog(shader, logLength, nil, gl.Str(log))

        return 0, fmt.Errorf("failed to compile %v: %v", source, log)
    }

    return shader, nil
}
The purpose of this function is to receive the shader source code as a string as well as its type, and return a pointer to the resulting compiled shader. If it fails to compile we’ll get an error returned containing the details.
Now let’s define the shaders and compile them from makeProgram. Back up in our const block where we define width and height:
vertexShaderSource = `
    #version 410
    in vec3 vp;
    void main() {
        gl_Position = vec4(vp, 1.0);
    }
` + "\x00"

fragmentShaderSource = `
    #version 410
    out vec4 frag_colour;
    void main() {
        frag_colour = vec4(1, 1, 1, 1);
    }
` + "\x00"
As you can see these are strings containing GLSL source code for two shaders, one for a vertex shader and another for a fragment shader. The only thing special about these strings is that they both end in a null-termination character, \x00 - a requirement for OpenGL to be able to compile them. Make note of the fragmentShaderSource, this is where we define the color of our shape in RGBA format using a vec4. You can change the value here, which is currently RGBA(1, 1, 1, 1) or white, to change the color of the triangle.
Also of note is that both programs start with #version 410, which you should change to #version 120 if using OpenGL 2.1. 120 is not a typo - use 120 not 210 if you’re on OpenGL 2.1!
Next in initOpenGL we’ll compile the shaders and attach them to our program:
func initOpenGL() uint32 {
	if err := gl.Init(); err != nil {
		panic(err)
	}
	version := gl.GoStr(gl.GetString(gl.VERSION))
	log.Println("OpenGL version", version)

    vertexShader, err := compileShader(vertexShaderSource, gl.VERTEX_SHADER)
    if err != nil {
        panic(err)
    }
    fragmentShader, err := compileShader(fragmentShaderSource, gl.FRAGMENT_SHADER)
    if err != nil {
        panic(err)
    }

    prog := gl.CreateProgram()
    gl.AttachShader(prog, vertexShader)
    gl.AttachShader(prog, fragmentShader)
    gl.LinkProgram(prog)
    return prog
}
Here we call our compileShader function with the vertex shader, specifying its type as a gl.VERTEX_SHADER, and do the same with the fragment shader but specifying its type as a gl.FRAGMENT_SHADER. After compiling them, we attach them to our program by calling gl.AttachShader with our program and each compiled shader.
And now we’re finally ready to see our glorious triangle! Go ahead and run, and if all is well you’ll see:
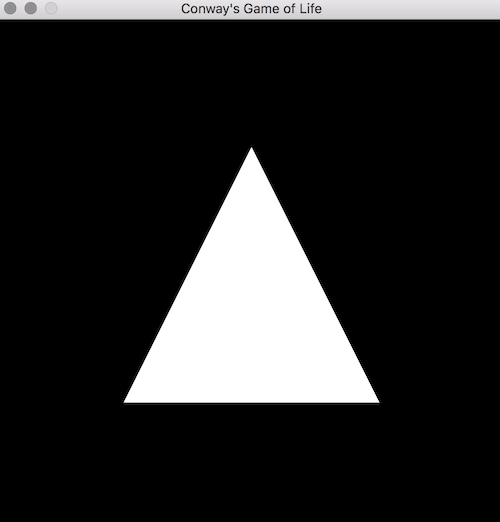
Summary
Amazing, right! All that for a single triangle, but I promise you we’ve setup the majority of the OpenGL code that will serve us for the rest of the tutorial. I highly encourage you to take a few minutes to play with the code and see if you can move, resize, and change the color of the triangle. OpenGL can be very intimidating, and it can feel at times like its difficult to understand what’s going on, but understand that this isn’t magic - it only looks like it is.
In the next part of the tutorial we’ll make a square out of two right-angled triangles - see if you can try and figure this part out before moving on. If not, don’t worry because we’ll be walking through the code in Part 2, followed by creating a full grid of squares that will act as our game board.
Finally, in Part 3 we continue by using the grid to implement Conway’s Game of Life!
Part 1: Hello, OpenGL | Part 2: Drawing the Game Board | Part 3: Implementing the Game
The full source code of the tutorial is available on GitHub.
Checkpoint
Here’s the contents of main.go at this point of the tutorial:
package main

import (
	"fmt"
	"log"
	"runtime"
	"strings"

	"github.com/go-gl/gl/v4.1-core/gl" // OR: github.com/go-gl/gl/v2.1/gl
	"github.com/go-gl/glfw/v3.2/glfw"
)

const (
	width  = 500
	height = 500

	vertexShaderSource = `
		#version 410
		in vec3 vp;
		void main() {
			gl_Position = vec4(vp, 1.0);
		}
	` + "\x00"

	fragmentShaderSource = `
		#version 410
		out vec4 frag_colour;
		void main() {
			frag_colour = vec4(1, 1, 1, 1.0);
		}
	` + "\x00"
)

var (
	triangle = []float32{
		0, 0.5, 0,
		-0.5, -0.5, 0,
		0.5, -0.5, 0,
	}
)

func main() {
	runtime.LockOSThread()

	window := initGlfw()
	defer glfw.Terminate()
	program := initOpenGL()

	vao := makeVao(triangle)
	for !window.ShouldClose() {
		draw(vao, window, program)
	}
}

func draw(vao uint32, window *glfw.Window, program uint32) {
	gl.Clear(gl.COLOR_BUFFER_BIT | gl.DEPTH_BUFFER_BIT)
	gl.UseProgram(program)

	gl.BindVertexArray(vao)
	gl.DrawArrays(gl.TRIANGLES, 0, int32(len(triangle)/3))

	glfw.PollEvents()
	window.SwapBuffers()
}

// initGlfw initializes glfw and returns a Window to use.
func initGlfw() *glfw.Window {
	if err := glfw.Init(); err != nil {
		panic(err)
	}
	glfw.WindowHint(glfw.Resizable, glfw.False)
	glfw.WindowHint(glfw.ContextVersionMajor, 4)
	glfw.WindowHint(glfw.ContextVersionMinor, 1)
	glfw.WindowHint(glfw.OpenGLProfile, glfw.OpenGLCoreProfile)
	glfw.WindowHint(glfw.OpenGLForwardCompatible, glfw.True)

	window, err := glfw.CreateWindow(width, height, "Conway's Game of Life", nil, nil)
	if err != nil {
		panic(err)
	}
	window.MakeContextCurrent()

	return window
}

// initOpenGL initializes OpenGL and returns an intiialized program.
func initOpenGL() uint32 {
	if err := gl.Init(); err != nil {
		panic(err)
	}
	version := gl.GoStr(gl.GetString(gl.VERSION))
	log.Println("OpenGL version", version)

	vertexShader, err := compileShader(vertexShaderSource, gl.VERTEX_SHADER)
	if err != nil {
		panic(err)
	}

	fragmentShader, err := compileShader(fragmentShaderSource, gl.FRAGMENT_SHADER)
	if err != nil {
		panic(err)
	}

	prog := gl.CreateProgram()
	gl.AttachShader(prog, vertexShader)
	gl.AttachShader(prog, fragmentShader)
	gl.LinkProgram(prog)
	return prog
}

// makeVao initializes and returns a vertex array from the points provided.
func makeVao(points []float32) uint32 {
	var vbo uint32
	gl.GenBuffers(1, &vbo)
	gl.BindBuffer(gl.ARRAY_BUFFER, vbo)
	gl.BufferData(gl.ARRAY_BUFFER, 4*len(points), gl.Ptr(points), gl.STATIC_DRAW)

	var vao uint32
	gl.GenVertexArrays(1, &vao)
	gl.BindVertexArray(vao)
	gl.EnableVertexAttribArray(0)
	gl.BindBuffer(gl.ARRAY_BUFFER, vbo)
	gl.VertexAttribPointer(0, 3, gl.FLOAT, false, 0, nil)

	return vao
}

func compileShader(source string, shaderType uint32) (uint32, error) {
	shader := gl.CreateShader(shaderType)

	csources, free := gl.Strs(source)
	gl.ShaderSource(shader, 1, csources, nil)
	free()
	gl.CompileShader(shader)

	var status int32
	gl.GetShaderiv(shader, gl.COMPILE_STATUS, &status)
	if status == gl.FALSE {
		var logLength int32
		gl.GetShaderiv(shader, gl.INFO_LOG_LENGTH, &logLength)

		log := strings.Repeat("\x00", int(logLength+1))
		gl.GetShaderInfoLog(shader, logLength, nil, gl.Str(log))

		return 0, fmt.Errorf("failed to compile %v: %v", source, log)
	}

	return shader, nil
}