


Unity 2D: Checking if a Character or Object is on the Ground using Raycasts
It’s a pretty common requirement in game development to need to know if a particular character or object is on the ground. For instance, your player may only be able to jump, attack, or interact while they are on the ground.
A common way to check this is to use a Raycast, which essentially allows you to detect if any physics bodies exist within an invisible line - the Raycast itself being that line.
In this post, I’ll show you how to use Raycasts to detect if an object is on the ground. For the purposes of this post, ground refers to GameObjects that are on the Ground layer and have a Collider attached to them. I’ll be writing from the perspective of a Player object that represents a character, but the same technique works for any GameObject.
Setup
The first thing we’ll need to do is add a public LayerMask to our player script. LayerMasks allow us to filter collisions based on the colliding body’s Layer, meaning we can limit our RayCast to search only for objects on the Ground layer.
In the player script, add the following:
public LayerMask groundLayer;
Now in the Unity editor, select your player and set the Ground Layer property like so:
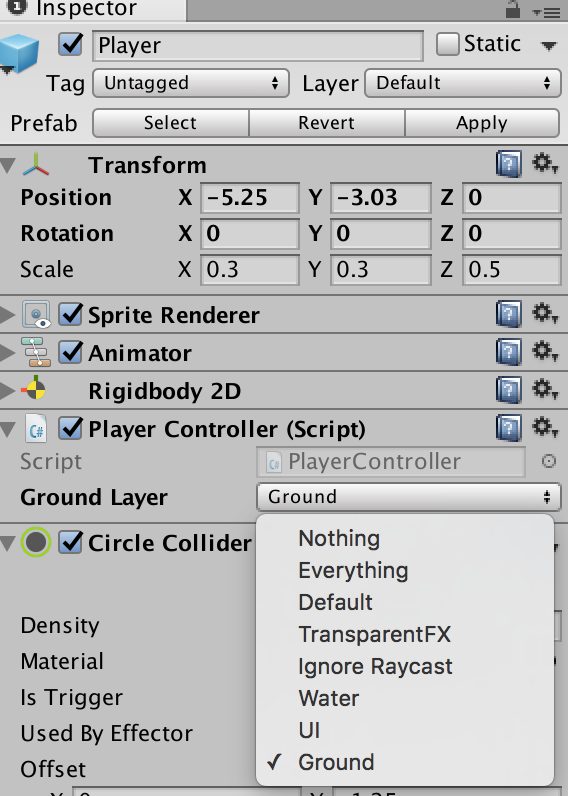
Again, this post assumes you have a Ground Layer setup and all your ground objects are on this Layer. Adjust to suit your needs as necessary.
Using Raycasts
With the LayerMask ready to go, we can now write our logic to determine if the player is on the ground.
In the same player script, we’ll add an IsGrounded function that performs the logic and returns a boolean - true if the player is on the ground, false otherwise.
public LayerMask groundLayer;

bool IsGrounded() {
    Vector2 position = transform.position;
    Vector2 direction = Vector2.down;
    float distance = 1.0f;

    RaycastHit2D hit = Physics2D.Raycast(position, direction, distance, groundLayer);
    if (hit.collider != null) {
        return true;
    }

    return false;
}
What we’re doing here is creating a Raycast using Physics2d, in a downward direction using Vector2.down (shorthand for Vector2(0, -1.0f)). We limit the Raycast to the groundLayer so that only Ground objects are detected, preventing us from colliding with our own physics body or that of anything else beneath us.
You’ll also notice we limit the distance of the Raycast, which is important because if the player jumps in the air, there would still technically be groundLayer objects beneath them - we’re interested only if it’s directly beneath them. It’s important to note that the value used (1.0f in this case) is going to vary based on your setup, so you’ll want to tweak and debug to determine what value works for your game.
Once the Raycast is complete, we check if there were any collisions using hit.collider != null. If the collider is not null, that means there was an object found and we are on the ground.
Now you’ll be able to perform checks in the rest of your player script to determine if the player is on the ground, and act accordingly. For instance, you could check if the player is on the ground before allowing them to jump:
void Update() {
    int yMovement = (int) Input.GetAxisRaw("Vertical")
    if (yMovement == 1) {
        Jump();
    }
}

void Jump() {
    if (!IsGrounded()) {
        return;
    } else {
        // Jump...
    }
}
Debugging
A useful trick for debugging Raycast checks if to use the DrawRay function of Debug. This allows you to visualize the Raycasts by drawing them out on the scene editor in Unity - not in the actual game itself.
To add DrawRay to the IsGrounded function above, you would do something like the following:
bool IsGrounded() {
		...
        Debug.DrawRay(position, direction, Color.green);
		RaycastHit2D hit = Physics2D.Raycast(position, direction, distance, groundLayer);
        ...
}
Now in the Scene editor of Unity, you’ll see a little green line on your player like the image below, allowing you to validate the Raycast:
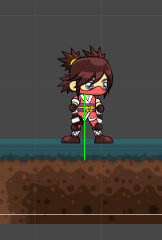
This is handy because you can monitor your Raycast as your player moves around, and ensure that it’s size and positioning is correct.