


React Native Tutorial Part 3: Developing a Calculator
Part 1: Hello, React | Part 2: Designing the Calculator | Part 3: Developing the Calculator
The full source code of the tutorial is available on GitHub.
Introduction
In Part 2 we created the layout and style of the calculator, but it still doesn’t do anything. In Part 3, we’ll continue from where we left off by handling touch events, performing the arithmetic, and updating the calculator UI using State.
Handling Touch Events
The first thing we need to do before we proceed is to handle touch events on the InputButtons.
First up, we’ll update the InputButton to use a Touchable view instead of the View it currently uses:
// InputButton.js
...

    render() {
        return (
            <TouchableHighlight style={Style.inputButton}
                                underlayColor="#193441"
                                onPress={this.props.onPress}>
                <Text style={Style.inputButtonText}>{this.props.value}</Text>
            </TouchableHighlight>
        )
    }

...
Don’t forget to import TouchableHighlight from react-native for this to work! You should also notice that we pass on the onPress prop to the TouchableHighlight view, so we’ll need to provide that from our presenting Component:
// ReactCalculator.js
...
_renderInputButtons() {
...
inputRow.push(
<InputButton
value={input}
onPress={this._onInputButtonPressed.bind(this, input)}
key={r + "-" + i}/>
);
}
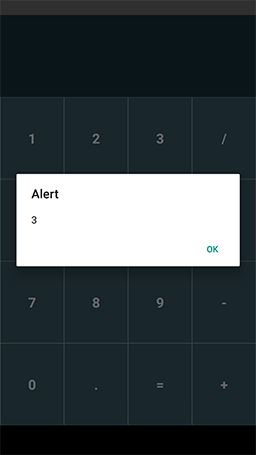
_onInputButtonPressed(input) {
alert(input)
}
...
In the _renderInputButtons function we set the onPress prop with a reference to a new function called _onInputButtonPressed. We also bind the function with a reference to the input value, which will allow us to know what action to take based on which InputButton was clicked.
For now, all we’re doing is calling alert to show a dialog with the input value that was provided. If you’ve been following along closely, you should be able to run and click one of the InputButtons to get something like this:
Now that we can handle touch events, and we know which button is being touched, we can start to develop the actual calculator functionality.
Using State
State allows us to update the UI of our applications based on dynamic data. The first thing we’ll use State for is to update the display based on the numbers entered by the user.
First, let’s add a constructor to our ReactCalculator class to initialize the input number to zero:
// ReactCalculator.js
...
class ReactCalculator extends Component {

    constructor(props) {
        super(props);

        this.state = {
            inputValue: 0
        }
    }
The constructor takes a single props argument and passes it up the the super constructor. What we’re more interested in however is where we set state equal to { inputValue: 0 }. During the constructor is the only time you can modify state directly, after which it must be deemed immutable and can only be modified using setState, as we’ll see in a moment.
Okay, so we have this inputValue, but how does it help us? We’ll, we’re going to use it in the display portion of the calculator that we created in Part 2. We’ll modify render to add a Text view to the displayContainer that displays the value of inputValue.
// ReactCalculator.js
...

    render() {
        return (
            <View style={Style.rootContainer}>
                <View style={Style.displayContainer}>
                    <Text style={Style.displayText}>{this.state.inputValue}</Text>
                </View>
                <View style={Style.inputContainer}>
                    {this._renderInputButtons()}
                </View>
            </View>
        )
    }

...
For good measure, here’s the new displayText style and updated displayContainer style as well:
// Style.js
...
    displayContainer: {
        flex: 2,
        backgroundColor: '#193441',
        justifyContent: 'center'
    },

    displayText: {
        color: 'white',
        fontSize: 38,
        fontWeight: 'bold',
        textAlign: 'right',
        padding: 20
    },
...
Running the app, you should see that zero is displayed in Text view. That’s because we set the value to this.state.inputValue, which we initialized to zero during the constructor. So how do we actually update the value as the user enters numbers?
Back in our _onInputButtonPressed function, we’ll check the type of input. If the type is a Number, we’ll set the inputValue on the state equal to (inputValue * 10) + input. That way, each time the user enters a number, it will be added to the end of the existing inputValue, with each digit shifted once to the left. For example, typing 1 will result in (0 * 10) + 1 = 1 because the initial inputValue is zero. Typing a subsequent 2 will result in (1 * 10) + 2 = 12, because the new inputValue was set to 1.
Take a look:
// ReactCalculator.js
...

    _onInputButtonPressed(input) {
        switch (typeof input) {
            case 'number':
                return this._handleNumberInput(input)
        }
    }

    _handleNumberInput(num) {
        let inputValue = (this.state.inputValue * 10) + num;

        this.setState({
            inputValue: inputValue
        })
    }

...
Run the app again, and you should be able to enter numbers and have them appear in the display! So how does this work? Any time you call setState, React determines which components need to be reloaded to reflect the updated state. In this case, our displayText Text view is updated based on the value of state.inputValue, so by calling setState with a new inputValue, the Text view is automatically reloaded.
The Final Stretch
At this point, our application is almost there. The last thing we need to do is handle the arithmetic operations.
We’ll start by storing the type of operation and clearing the display whenever an arithmetic symbol is selected, and highlighting the selected symbol:
// ReactCalculator.js
...

    constructor(props) {
        super(props);

        this.state = {
            previousInputValue: 0,
            inputValue: 0,
            selectedSymbol: null
        }
    }

    _renderInputButtons() {
        ...
        inputRow.push(
            <InputButton
                value={input}
                highlight={this.state.selectedSymbol === input}
                onPress={this._onInputButtonPressed.bind(this, input)}
                key={r + "-" + i}/>
        );
        ...
    }

    _onInputButtonPressed(input) {
        switch (typeof input) {
            case 'number':
                return this._handleNumberInput(input)
            case 'string':
                return this._handleStringInput(input)
        }
    }

    ...

    _handleStringInput(str) {
        switch (str) {
            case '/':
            case '*':
            case '+':
            case '-':
                this.setState({
                    selectedSymbol: str,
                    previousInputValue: this.state.inputValue,
                    inputValue: 0
                });
                break;
        }
    }
...
Alright, so what’s going on here? In the constructor we’ve added two more properties to the state: previousInputValue and selectedSymbol.
In the InputButton initialization, we now pass a new highlight property: a boolean set to true when the selectedSymbol value matches the value of the InputButton. This will display a highlight, for example, on the multiplication button when you select the multiplication symbol.
In the touch event handler, we also handle string input types now, by calling _handleStringInput. The _handleStringInput function is responsible for updating the selectedSymbol, clearing the inputValue, and assigning it to the previousInputValue which we aren’t using yet.
In the InputButton class, we need to support the new highlight prop:
// InputButton.js
...
    render() {
        return (
            <TouchableHighlight style={[Style.inputButton, this.props.highlight ? Style.inputButtonHighlighted : null]}
            ...
This demonstrates something we haven’t done yet, using multiple styles. This works essentially the same as CSS, with the properties of each style cascading. This is very powerful, and allows us to overwrite properties from previous styles, and to apply conditional styles like in the case above.
The inputButtonHighlighted style will only be applied when the highlight prop is set to true, and looks like so:
// Style.js
...
    inputButtonHighlighted: {
        backgroundColor: '#193441'
    },
...
The final thing we need to do is handle the = operator. We’ll update _handleStringInput for this:
// ReactCalculator.js
...
    _handleStringInput(str) {
        switch (str) {
           ...

            case '=':
                let symbol = this.state.selectedSymbol,
                    inputValue = this.state.inputValue,
                    previousInputValue = this.state.previousInputValue;

                if (!symbol) {
                    return;
                }

                this.setState({
                    previousInputValue: 0,
                    inputValue: eval(previousInputValue + symbol + inputValue),
                    selectedSymbol: null
                });
                break;
        }
    }
...
Here we ensure a selectedSymbol is set. Assuming it is, we clear the previousInputValue and selectedSymbol values, and set the inputValue equal to the result of the selected mathematical operation. This updates the UI with the result of the equation, clears the highlighted InputButton, and allows the user to continue performing calculations on the results.
Here’s a look at what 24 / 3 looks like:
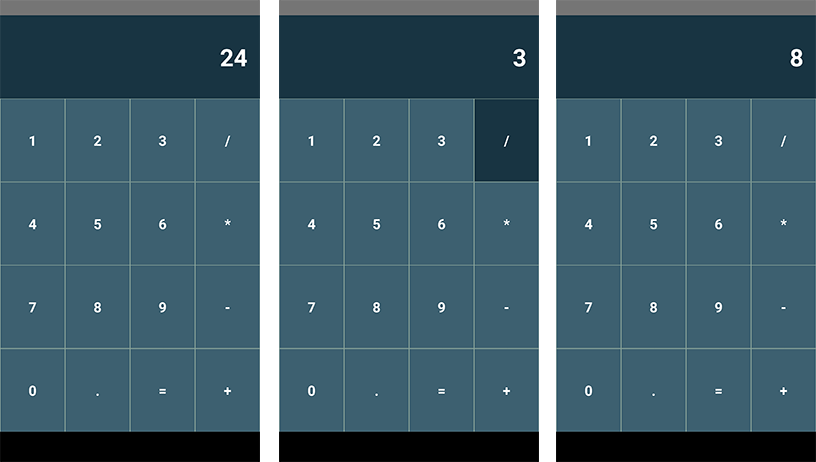
Now we know!
Where to Go From Here
Even though the tutorial has come to an end, there are a couple of intentionally unhandled components that you can try to solve on your own from here:
- The decimal (.) operator remains unimplemented. How can you take what you’ve learned to implement this?
- Try dividing by zero.
- There’s no way to clear (C) the current input or clear everything (CE) in order to restart your calculations with a clean slate.
Feel free to take a stab at these features, and post in the comments if you come up with some solutions!
Conclusion
Hopefully this tutorial has provided you with a great enough understanding of React Native to get your started towards writing your own applications. There’s a ton of great content on the official React Native website that we couldn’t possible go over in a single tutorial. The framework really is a game changer in terms of developing or rapidly prototyping cross-platform mobile applications, and it’s certainly a tool I’m going to keep up-to-date with and likely use for a few future applications.
If you’ve found any issues with the code samples in the tutorial, please do let me know by posting an issue to the ReactCalculator repository on GitHub, or better yet feel free to provide a pull request!